Raspberry Pi Setup
From pre-built image (recommended)
-
Install Balena Etcher.
-
Download the latest call-of-nature-rpi5.img.gz image (ask Lionel if not available).
-
Open Balena Etcher and flash the image to your SD card.
-
Insert the SD card in the Raspberry Pi and plug it on.
-
Shortly after, you should be able to find a wifi hotspot named
CallOfNature, connect to it with passwordNatureIsCalling. -
Navigate to the system admin UI at https://callofnature.local:9090/storage.
-
Login with username
slimyand passwordNatureIsCalling. -
If one of the storage shows a warning icon, click on it and on the next page click on "Grow content".
You should now be able to reach the main control panel at http://callofnature.local:8000.
From scratch (expert mode)
Imaging the OS
Insert the SD card in your computer.
Install the Raspberry Pi Imager.
Download the rpi5-gadget-mode.rpi-imager-manifest manifest file and open it.
This will open the Raspberry Pi Imager.
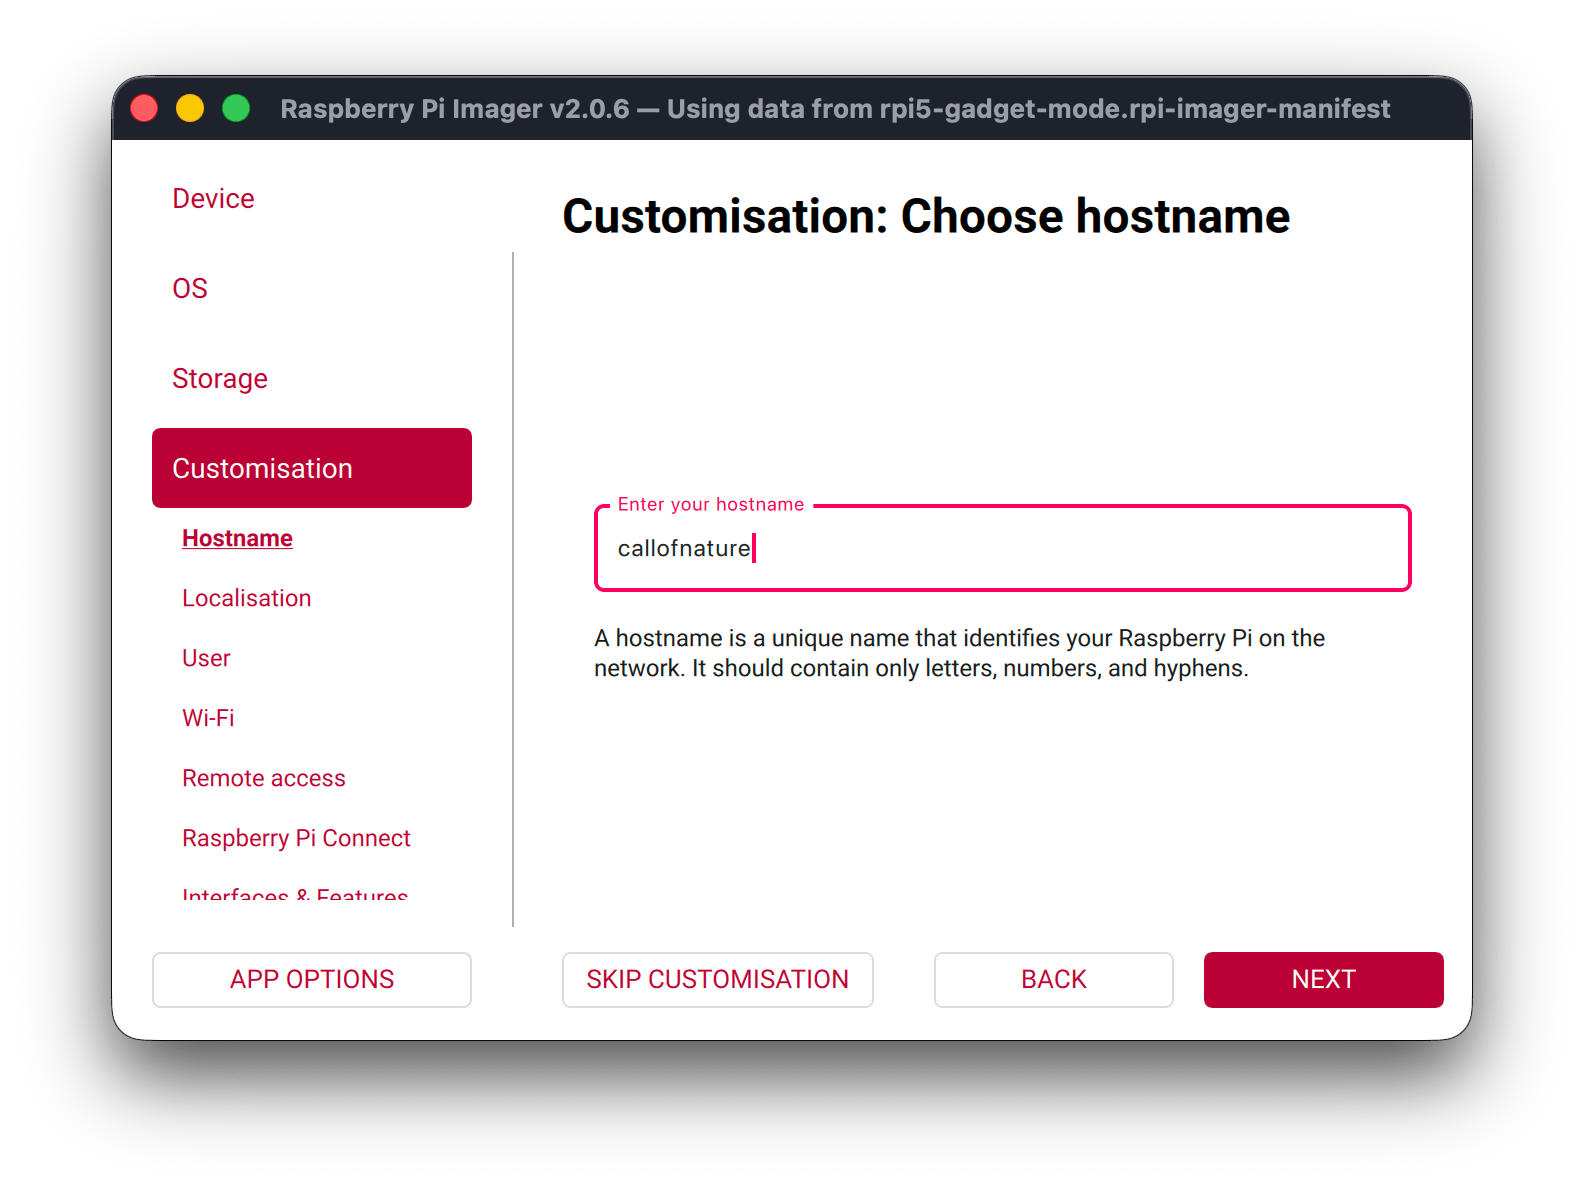
On the hostname screen, enter callofnature.
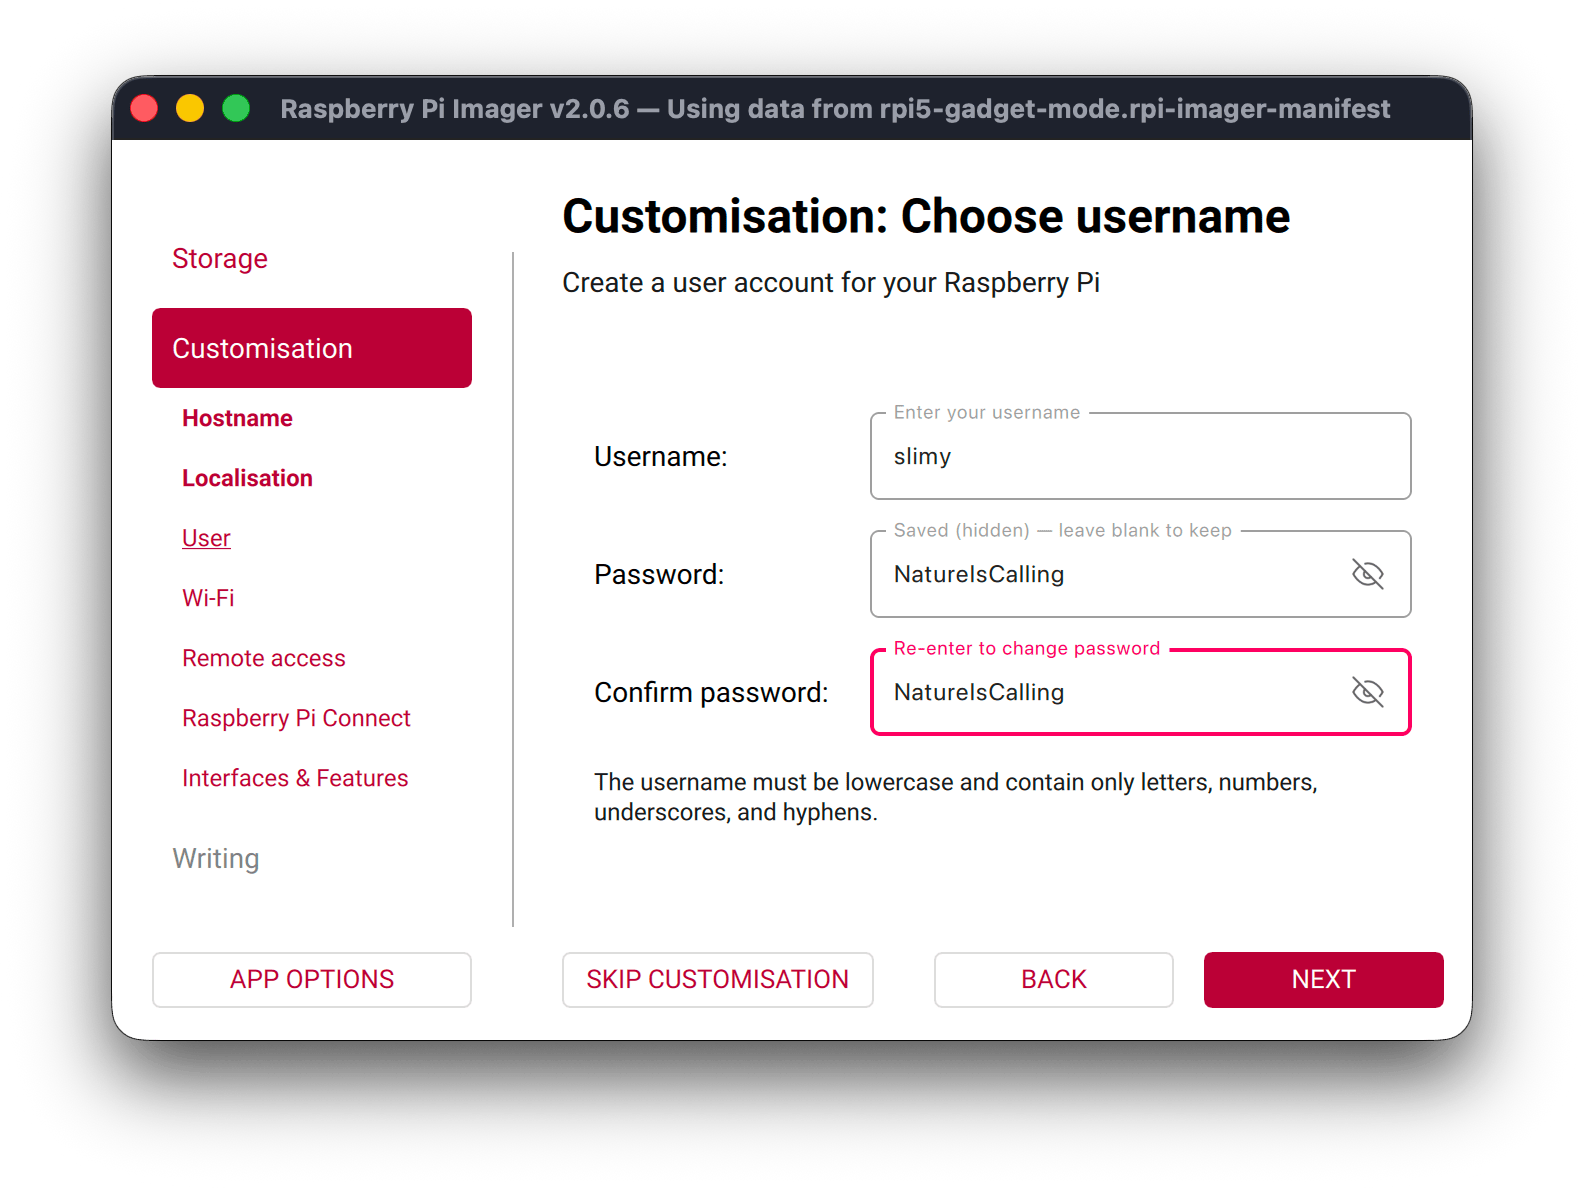
On the username screen, enter slimy as username and NatureIsCalling as password.
On the SSH screen, enable it with password authentication.

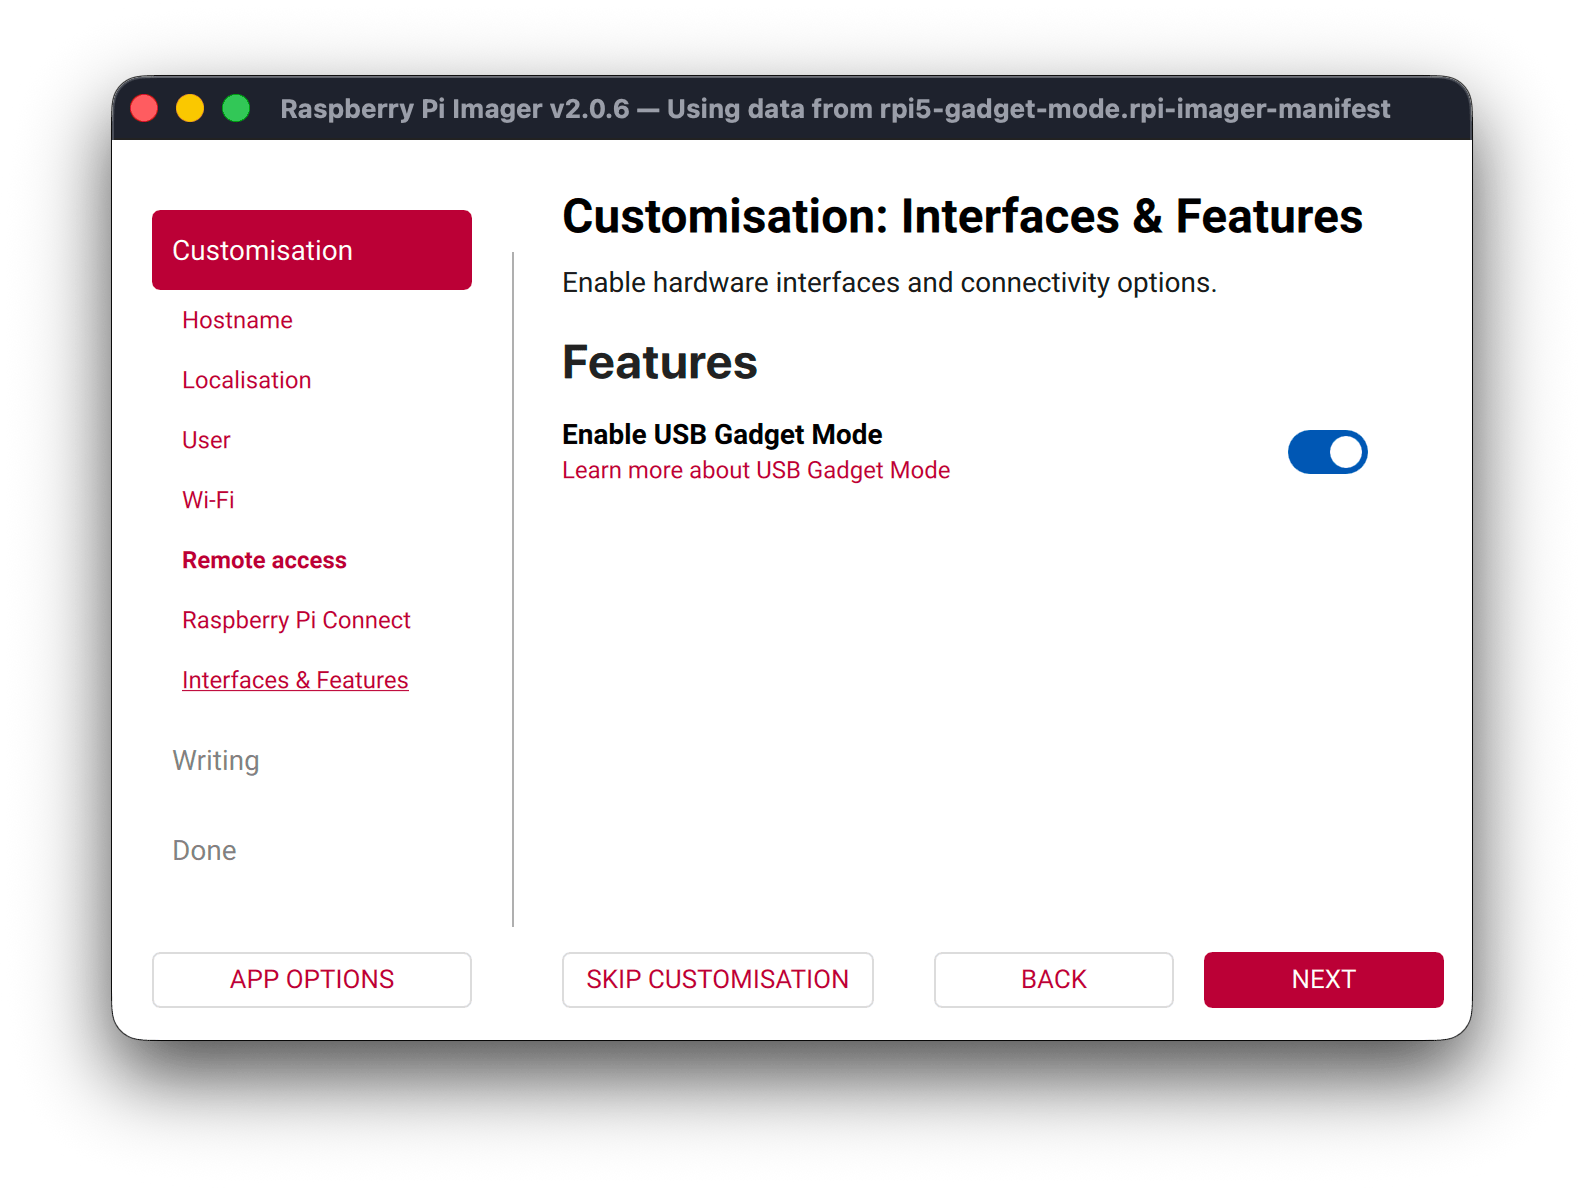
On the interface and features screen, enable gadget mode.
Proceed with imaging of the SD card. Once completed, insert it in the Raspberry Pi.
Setting up the service
Connect your computer to the Raspberry Pi USB-C port. Follow the official gadget mode guide to learn how to enable internet sharing from your computer to the Raspberry Pi to continue this setup.
Open a terminal and verify the Raspberry Pi is reachable (Ctrl+C to stop)
Unzip the project executable archive and copy it to the Raspberry Pi (replace path/to with the location).
Reach out to Lionel if you do not have the executable
From your host, run the provision script to setup the Raspberry Pi services.
Connect to wifi hotspot CallOfNature with password NatureIsCalling and you should be able to reach the control panel at http://callofnature.local:8000/
Creating a system image
SSH on the Raspberry Pi.
Shut it down.
Insert the SD card in a macOS system, open a terminal and find your disk.
Unmount the disk (do not eject).
Create the raw image.
Eject the SD card.
Install PiShrink in Docker.
git clone https://github.com/Drewsif/PiShrink
cd PiShrink
docker build -t pishrink .
echo "alias pishrink='docker run -it --rm --privileged=true -v $(pwd):/workdir pishrink'" >> ~/.bashrc && source ~/.bashrc
Shrink the image.